Bubble.io
In this guide, you will learn how to install the Usermaven tracking pixel in your Bubble.io app, as well as how to identify users and companies while tracking events.
Below is the step-by-step guide to achieve this:
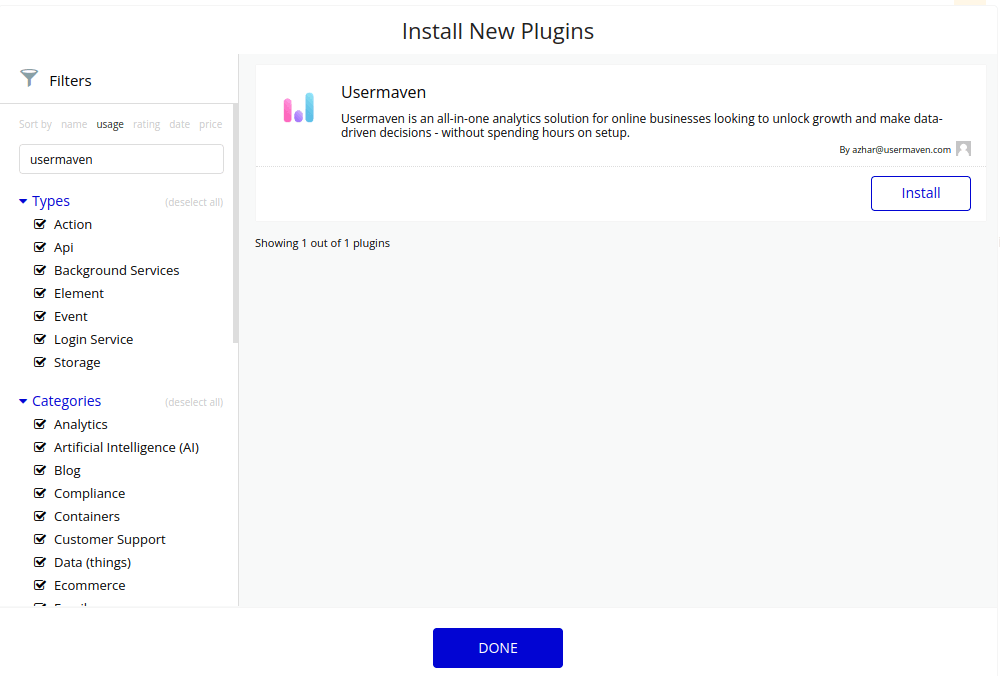
1. Install Usermaven plugin in your Bubble.io application
Within your Bubble.io app, navigate to the Plugins tab and click on Add plugins. Search for Usermaven and proceed to install the plugin.
2. Configure tracking setup for Bubble.io plugin
After successfully installing the plugin, proceed to configure the tracking setup within the plugin by following these steps:
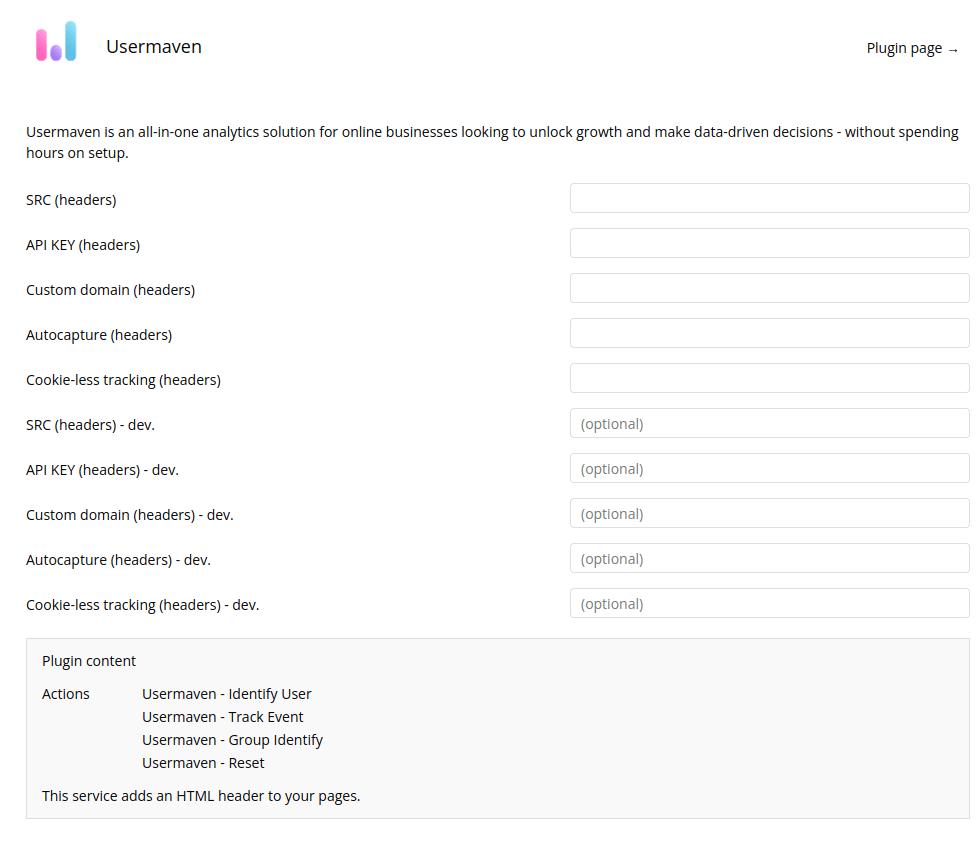
To access the configurations for your plugin, follow these steps:
Log in to your Usermaven account.
Navigate to the Workspace Setup section.
Locate the API key and other values such as src, data-tracking-host, data-autocapture, and data-privacy-policy from the script, as demonstrated in the illustration below:
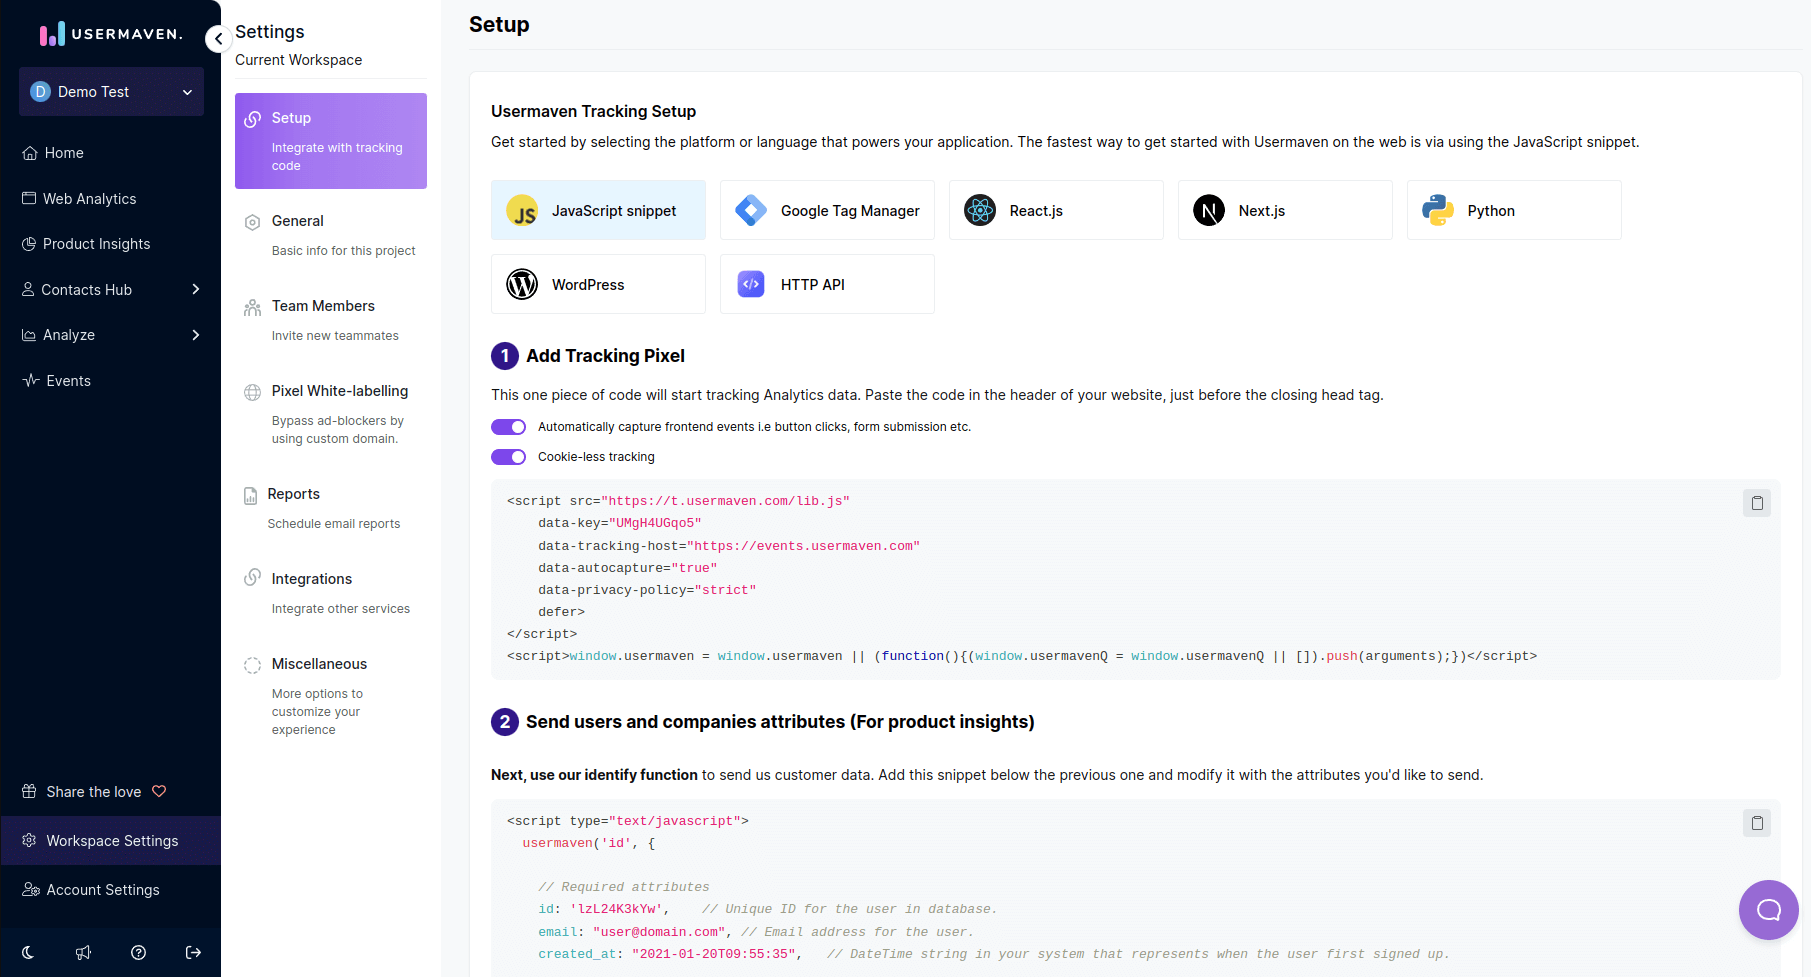
<script src="SRC"
        data-key="API_KEY"
        data-tracking-host="https://events.usermaven.com"
        data-autocapture="autocapture"
        data-privacy-policy="true"
        defer>
</script>
<script>window.usermaven = window.usermaven || (function(){(window.usermavenQ = window.usermavenQ || []).push(arguments);})</script>;
Copy the API key and other attributes, then paste them into their respective sections on the configuration page. Once completed, your Bubble.io app will begin sending important data to your Usermaven workspace.
Note: Depending on your preferences for autocapture, cookie-less tracking, and custom domain, your script will be dynamically generated in your workspace setup section. Ensure that you copy these values and paste them into the Bubble.io plugin configuration page accordingly.
3. Track events and identify users
The Usermaven Plugin allows you to track user activity within your app. Upon installation, the snippet is automatically added to the pages, eliminating the need for manual input. If autocapture is set to true in the configuration, it will also capture events automatically.
Furthermore, the plugin includes actions for user identification, event tracking, group identification, and reset, which you can configure in your app's workflow according to your specific needs.
The plugin includes the following actions:
Identify user
Use this action to initially identify your users in your Usermaven dashboard. Generally, this is done as part of the sign-up flow.
For example, you can link the identify user action with the sign-up button by editing the workflow of your sign-up button as follows:
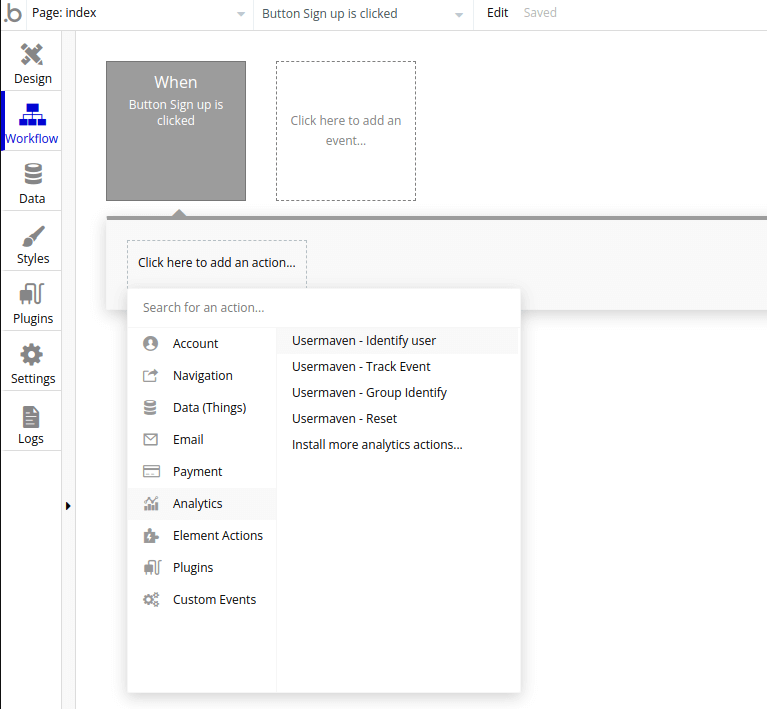
Upon clicking "Send User to Usermaven," enter the required fields of id, email, and created_at. You can also provide optional information, such as first_name, last_name, and custom fields, as shown below:
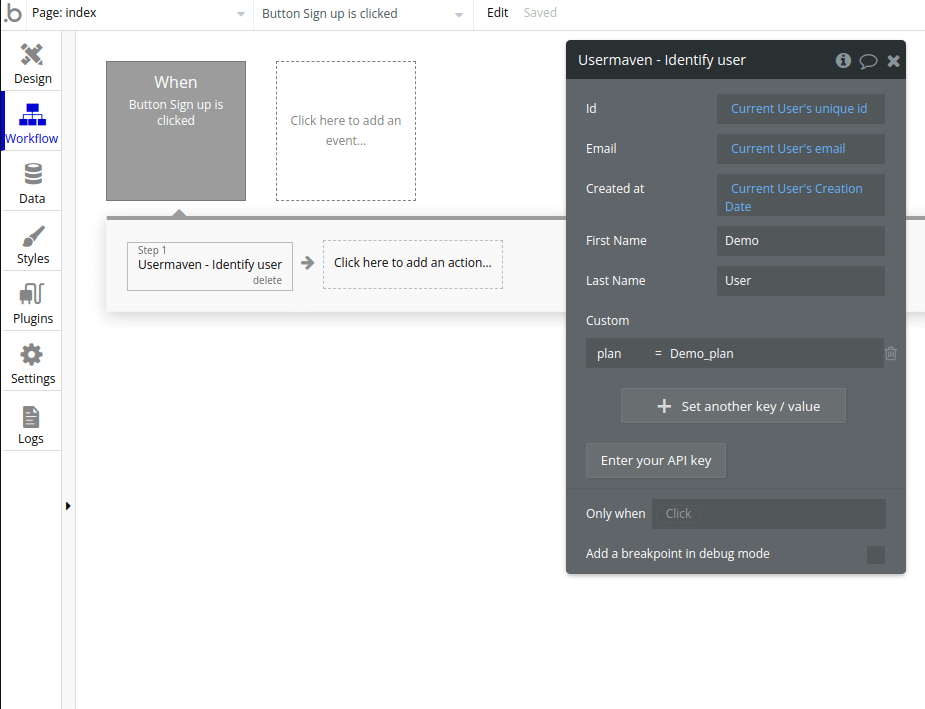
By configuring the workflow in this manner, whenever the sign-up button is clicked, it will send an identify user call to Usermaven.
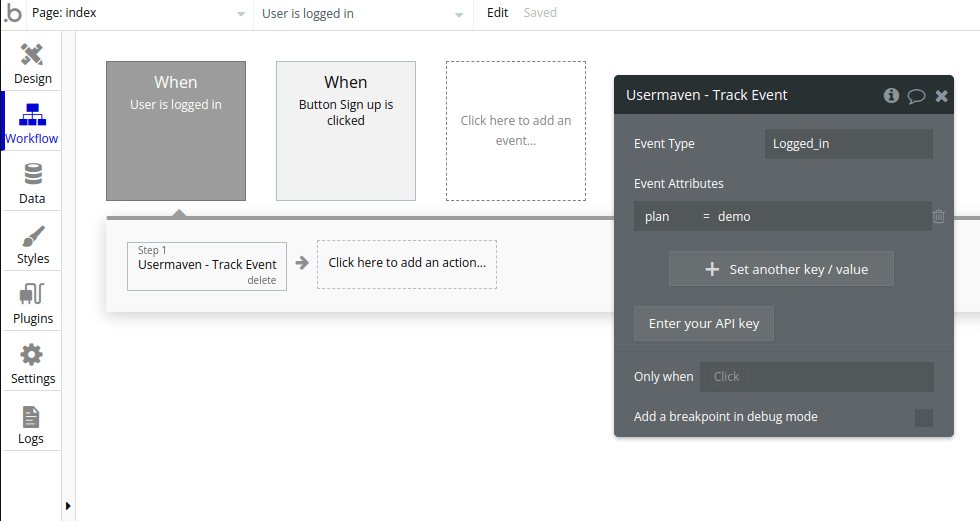
Track event
Track events associated with groups and users in your app, and add any custom fields you want as event_attributes.
For example, you can send a track event call whenever a user logs in to your application:

Group identify
Use this action to initially identify that a specific user belongs to a particular group/company in your Usermaven dashboard. This typically refers to teams or companies. You can add this action to the workflow that initially creates the data record for the team or company in your app. The steps for linking this action to your workflow are similar to those for the identify user and track event actions.
Reset
The reset action clears user and company data from the cookie. You should use this action when a user logs out of your application.
Was this article helpful?