Creating pinned events
While in many other analytics platforms, tracking events requires custom code development, Usermaven takes a different approach. It automatically tracks everything, significantly simplifying event definition. Since Usermaven records data from day one, every event definition is entirely retroactive.
What are pinned events?
Pinned events are one of Usermaven’s core features that simplify analytics tracking. They represent the top actions and events that you may wish to monitor, such as signups, purchases, button clicks, downloads, etc.
- You can mark any event as a pinned event, for example, a button click on a specific page.
- You can group similar items as a pinned event, for example, a similar button that is present on different pages.
How to create pinned events?
As soon as you install the Usermaven tracking script, it’ll start capturing events from any actions performed by users on your website or app in real-time.
If your website or app has low traffic, you can visit all important pages and perform all important actions on your own to record them for the first time.
There are two different routes you can take to create pinned events which are explained below.
1. Creating a pinned event from a single event
- Go to the ‘Events’ page from the main menu.
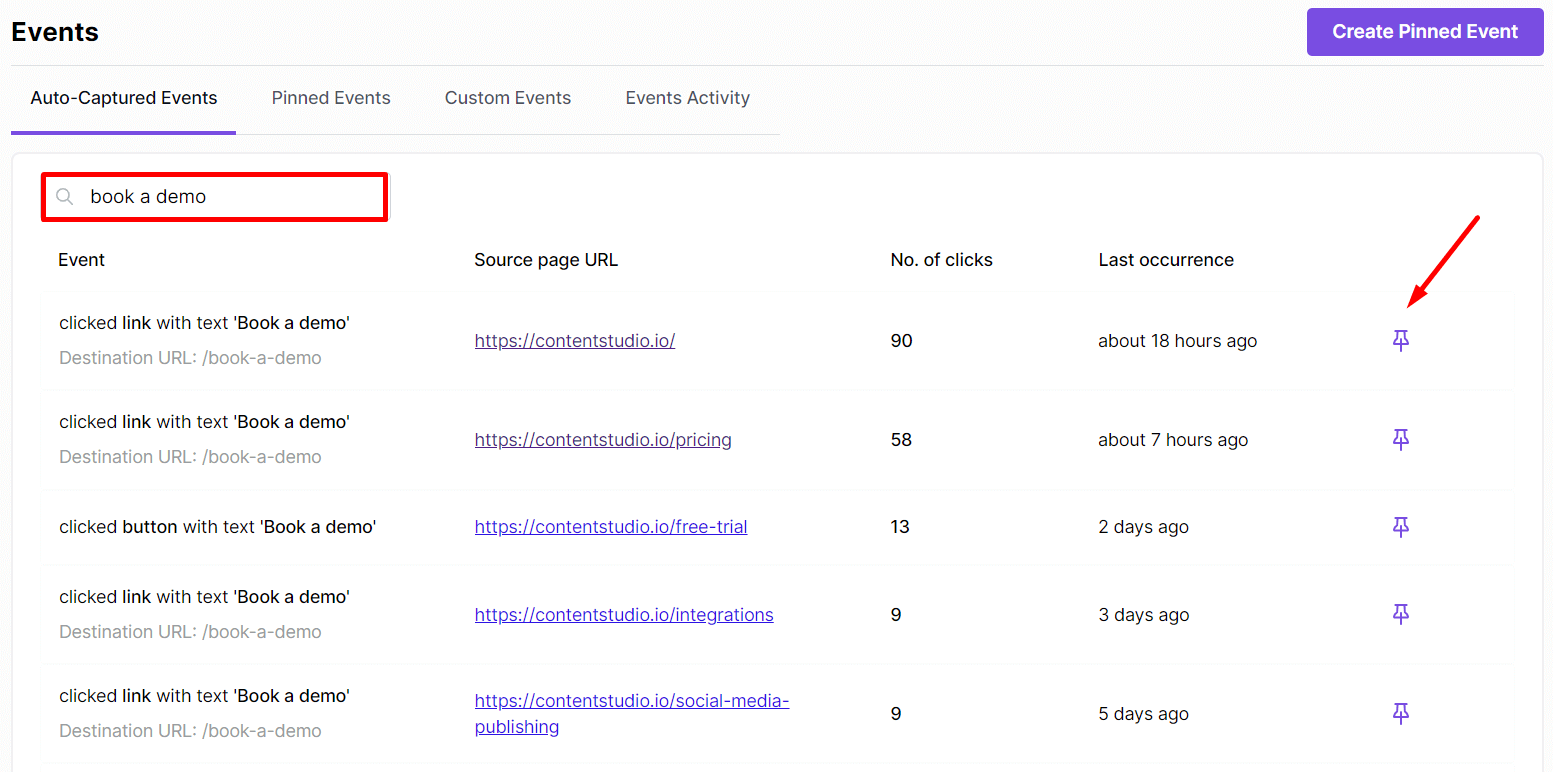
- In the auto-captured events tab, find the action you want to pin by a simple search.
- Click the pin icon in the last column.
- Give it a name on the opened modal and save.

You can see in the above image that the ‘book a demo’ action can be performed by different buttons/links present on different pages. So, if you’d like to group them together and measure their aggregate analytics, that’s also possible with pinned events.
2. Create a pinned event by grouping similar events
- Click the ‘Create Pinned Event’ button at the top right corner on the events page.
- Give your pinned event a name.
- Use the query builder to select the events you want to group. There are six different ways to find and
select a button or link click event.
- By button or link’s label text
- By button or link’s CSS attributes
- By source page URL where the button or link is present
- By destination URL (anchor link) of the button or link
- By HTML element ID
- By HTML element name
You can use AND OR conditions in the query to limit your events to specific elements, specific pages, etc., which makes Usermaven’s pinned events feature quite powerful.
Some examples
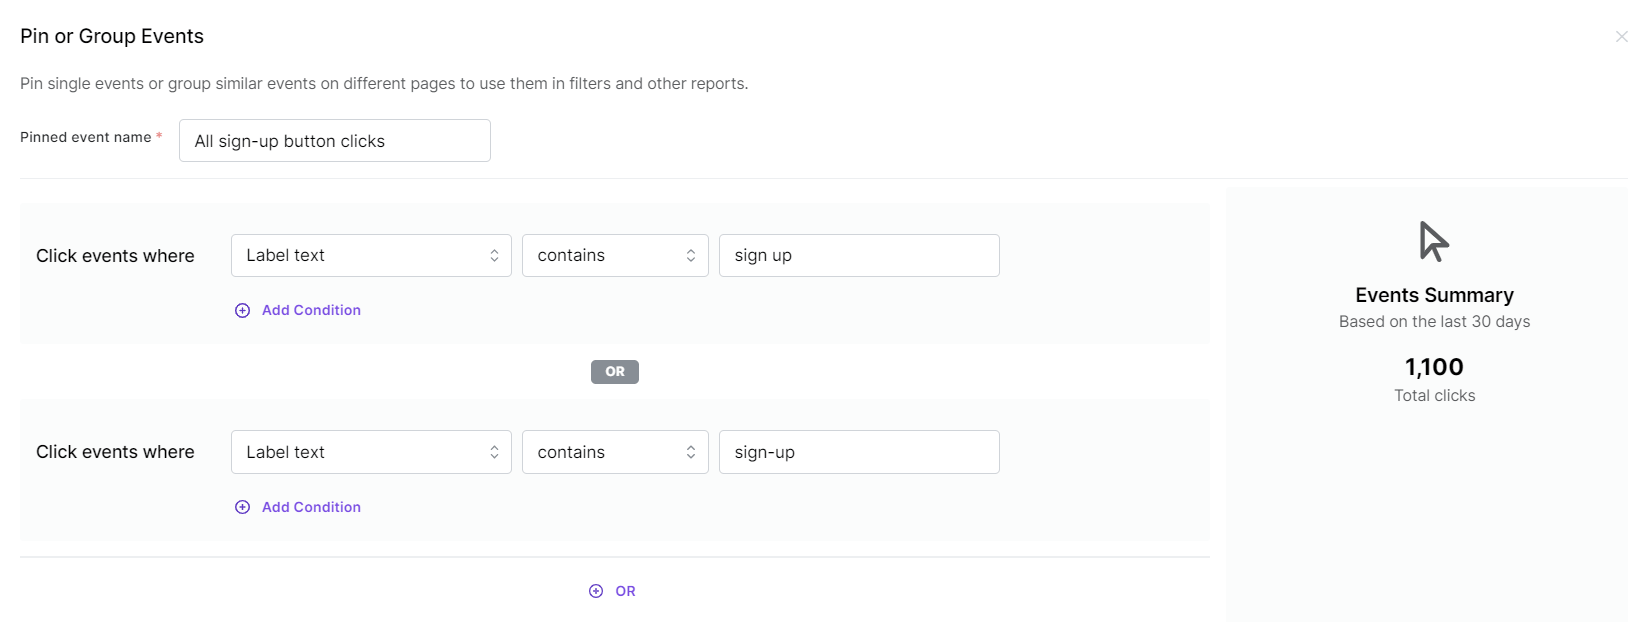
1. Tracking clicks from all ‘sign-up’ buttons on the website.
Let’s suppose that we have sign-up buttons on different pages of the website and they contain the text “sign up” or “sign-up”. So, we’ll use the query builder as shown in the image below.

2. Tracking clicks from a specific button on the website’s homepage.
In this example, we want to track clicks on only one button, which has the label text ‘Start your free trial’ and is located on the website’s homepage.
![]()
3. Tracking all button clicks that lead to a specific destination page.
In this example, we are tracking clicks on all buttons that are taking users to a specific link which in this case is ‘app.contentstudio.io/signup’.

The important thing to note here is that if you add any new buttons or elements to your website that match the conditions you’ve specified in the query builder, Usermaven will automatically track them so you don’t have to re-do anything.
If you have a specific case that is not covered by the examples above, please send us a support ticket and we’ll help you out.